
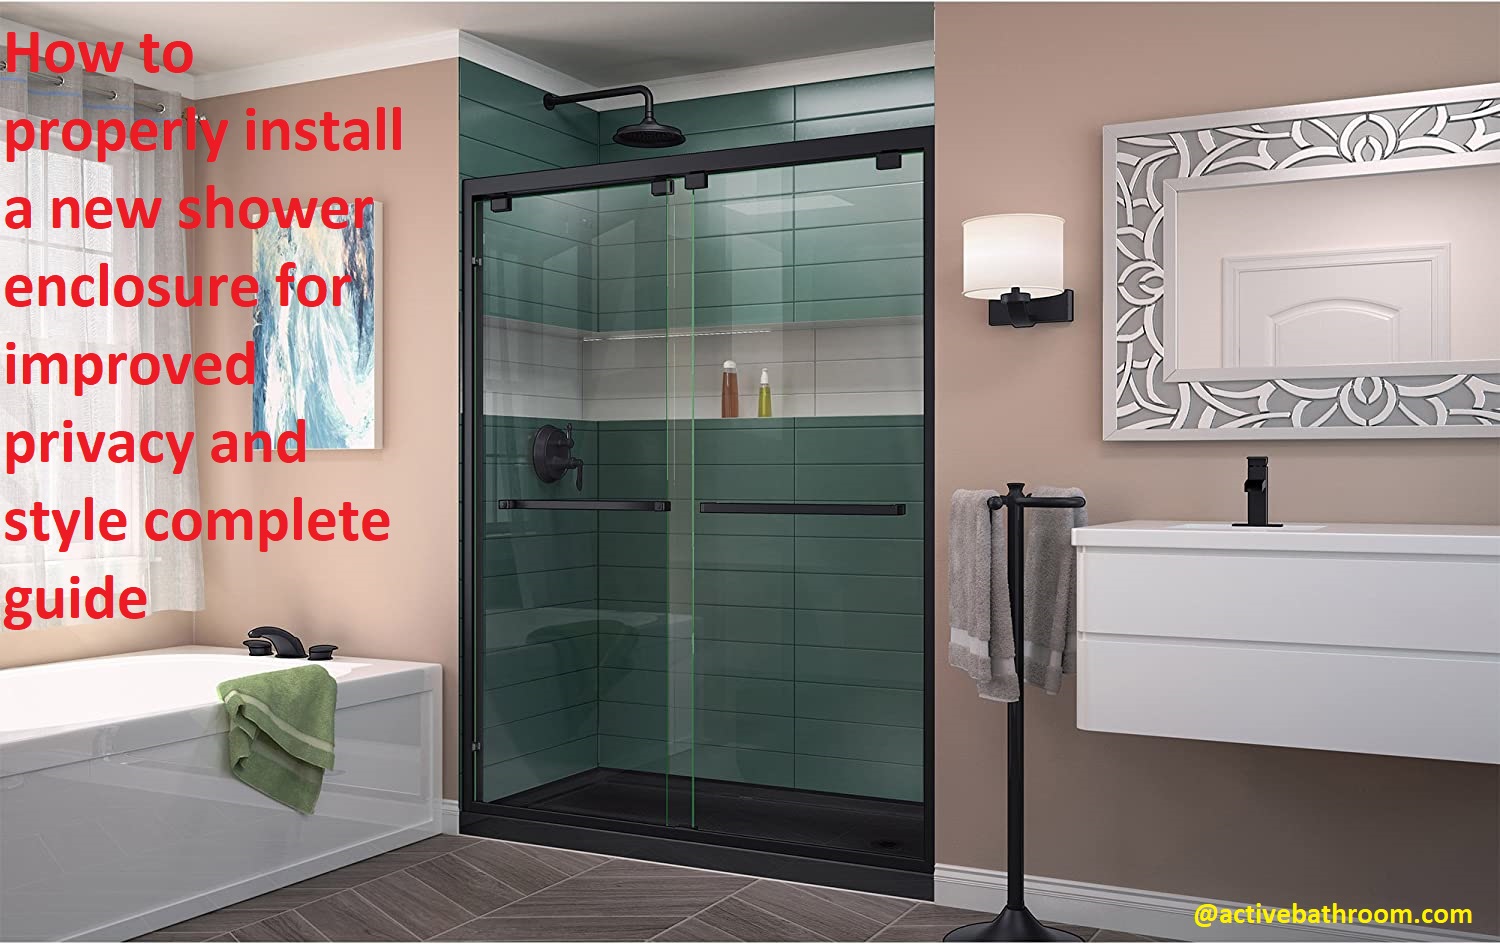
You want to enjoy a peaceful, private shower experience in your new bathroom but don’t know how to properly install a shower enclosure? If you want to bring your vision for privacy and style to life, read on for our complete guide.
Discover how simple it can be to create a luxurious space where you can escape from the world.
Introduction
Installing a new shower enclosure can be a great way to update the look of your bathroom while also increasing the level of privacy. Whether you’re replacing an old enclosure or installing a brand new one, there are several things you should take into consideration. In this guide, we’ll walk through each step needed to properly install your new shower enclosure and discuss some tips for ensuring it looks its best and provides the highest level of privacy and safety.
If possible, first consult with a professional such as a plumber or contractor before you begin installation. This guide is intended only as supplemental information after careful research and should not replace professional advice or services when needed. Let’s get started!

Explanation of the importance of a shower enclosure
Installing a shower enclosure can make a significant improvement to the look, privacy, and functionality of your bathroom space. Along with providing superior privacy when showering, an enclosure can also increase the value and appeal of the entire space. Plus, improving your bathroom design with a shower enclosure will make it easier to clean, faster to use every day, and more comfortable overall.
A shower enclosure also gives you more control over the design and layout of your bathroom. This is valuable if you’re trying to create an open plan that incorporates seating or other features either in or around the shower area. Furthermore, enclosures can be tailored in size to suit the exact needs of any unique space. It’s important to consider all potential layouts before making a final decision about what type of enclosure is best for your situation.
In addition to giving you more control over your bathroom design, installing a shower enclosure also comes with several functional benefits. It helps create an organized space for storage underfoot by organizing everything from body wash to shampoo bottles into neat compartments or caddies that can hang from walls outside the actual enclosed area. Moreover, being able to keep all these items contained means it will be easier for everyone – especially kids – to access them safely when taking showers or baths on their own.
Enclosures are available in different sizes, styles, materials and colours – allowing you limitless customisation possibilities when it comes time for installation! From frameless glass panels that provide superior visibility and style to sliding tub doors that optimize space and provide easy access for kids – there is no shortage of options for sprucing up any bathroom!
Brief explanation of the benefits of installing a new shower enclosure
A shower enclosure provides more privacy and an improved aesthetic to any bathroom setting. Aside from enhancing the overall look and feel of your bathroom, installing a new shower enclosure has practical benefits and advantages as well. An enclosed shower can be more secure against possible water leakage than just a regular curtain which, in addition to being unhygienic, can cause long-term damage to walls and flooring due to dampness.
Shower enclosures also offer a greater sense of space as the area around them remains dry, providing the perfect stage for customizing with accessories such as mirrors or shelves that help create an original design in the bathroom. Furthermore, investing in high-quality glass walls increases not only the privacy but also light refraction due to their bright surface; which in turn can contribute to amplifying the look in a small shower room. Finally, using easy-to-clean materials helps maintain hygiene standards while avoiding build up or etching from non-waterproof products such as stone or wood that require regular maintenance.
Assessing the need for a new shower enclosure
When it comes to installing a new shower enclosure, it’s important to assess the need before entering into the task. As with any other project that involves demolition, there are certain safety risks and potential damages that can occur if proper care isn’t taken when demolishing the old enclosure. Additionally, using the wrong materials during installation can lead to malfunctions or even loss of property. Therefore, before beginning a new shower enclosure installation, it is essential to complete the following steps:
- Evaluate existing shower walls and adjoining surfaces. It is extremely important to inspect current walls and flooring for any decay or deterioration prior to demolition. If there is evidence of mold or rot in the area, it would be wise for homeowners to contact a local contractor before attempting any repair work on their own.
- Determine which type of material should be used on walls and floors surrounding the newly installed enclosure; different options available include standard tiles, waterproof wall board panels, acrylic panels and glass blocks (used for an outdoor environment). Depending upon environmental conditions in your home, you may want to consider whether these materials should be sealed prior to installation to prevent water from seeping through small crevices or cracks.
- Assemble necessary tools and equipment: hacksaw blade (if you plan on cutting metal framing), silicone caulk/glue (to join frame together), screws (for secure installation of shelves), trowel/scraper (to apply tiles) and so on—making sure you have all the right supplies before starting will help ensure your installation goes smoothly.
4 Measure existing opening area between surrounding walls accurately—with any miscalculation meaning incorrect fittings could potentially cause future problems with regards leakage and overall structural integrity-being sure this step is accurate will ensure future problems are avoided and structural integrity is maintained as much as possible.
Determining if the current enclosure is damaged or outdated
When remodeling your bathroom, the shower enclosure is a key component. It can help provide increased privacy and improved style. Before installing a new enclosure, it’s important to determine if the current enclosure is damaged or outdated. If you have an old, rusted shower enclosure that has seen better days, it may be time for an upgrade. However, if the current shower enclosures are still in good condition but just need a facelift in terms of style and design, it may be possible to simply do a surface-level makeover instead of replacing the entire unit with a brand new installation.
In order to assess whether or not you should keep or replace your current shower enclosure, you’ll want to take a closer look at any visible damage as well as any hidden damage that could be missed. Visible damage could include rust (especially around joints where metal pieces are connected), discoloration due to age and wear, cracks in glass or bathroom tiles around the existing framework, or other issues with window seals or frames. Hidden damage could include water leaks that have caused damage behind walls or on floors beneath the shower stall that are not visible until you tear out some plaster and check for signs of water infiltration behind walls.
Overall, if there is enough visible and/or hidden damage then it may be time for an installation of a new shower enclosure instead of attempting repairs on what already exists in the bathroom space.
Checking for signs of poor functionality or inadequate privacy
When checking for signs of inadequate privacy or poor functionality of existing shower enclosures, it is important to look for damage, wear, and other signs of age.
Start by inspecting the water seals and caulking around the base for breaks or gaps that would allow water to seep out. Also check for any rust spots on the railing or scaffolding which could indicate a break or decay in the metal.
Additionally, look at the doors and glass panels themselves to make sure they fit correctly and are not cracked or broken anywhere. If light is showing through from above, below, or beside you may need better insulation against sound and light leakage.
Finally, consider if there is adequate space provided within your current enclosure to comfortably move around while showering as well as reaching towel racks, shampoo dispensers, and other fixtures that may be outside it.
Planning the installation process
After the appropriate measurements have been taken, the next step is to plan the installation prior to beginning any hard labor. This will include acquiring supplies such as shower walls, a shower threshold (the edge at which a shower becomes a wet floor), a drain assembly, sealing tape and tools (a drill, screws and anchors are typically necessary). It is also important to read through all installation instructions prior to starting so that installation can be efficiently completed. Each type of wall panel or tile installation has its own set of requirements with regards to adhesive and preparation. As such, appropriate preparations must be made in order for each step of the process to occur.
Furthermore, preparation for plumbing connections should be made before the walls are put into place. In order to properly make those connections an experienced plumber will be necessary (unless you have experience with plumbing connections). Additionally, after the tile or paneling has been installed ensure that all corners are properly caulked with waterproof sealant as this will ensure durability and water protection within your new shower enclosure.
Selecting a new shower enclosure
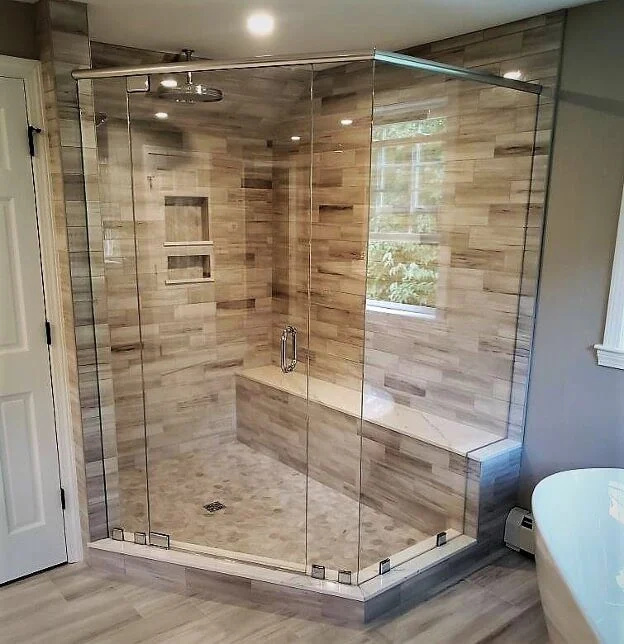
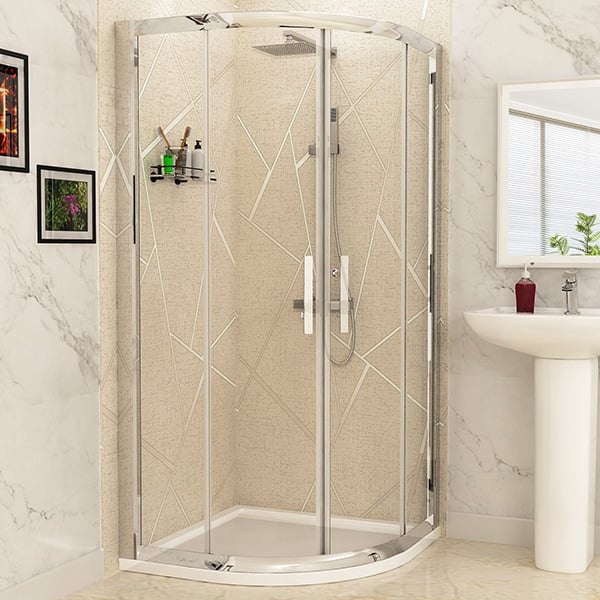
When it comes to selecting a new shower enclosure, there are a few key factors to consider. From the frame material, door type, and overall size of the enclosure, the options are nearly endless.
It’s important to select an enclosure that will fit properly in your bathroom and match your décor style. If your space is small but has full-height tile around it, opt for square formed designs that can optimize every inch of space. Conversely, walk-in showers create versatile layouts and come in many different sizes for maximum desirability. Further adding to the selection process is choosing a glass type; this ranges from standard smooth types to textured rain glass for complete privacy and light diffusion. The door style is just as important. There are several options such as bi-fold, continuous hinge or pivot hinges depending on the model you ultimately choose. Therefore it’s important to ensure the correct measurements once you have chosen an enclosure so it fits properly in your bathroom space when installed correctly.
Calculating the required size and shape
A proper assessment of the space must be assessed in order to determine the size and shape of the new shower enclosure that will be required. The walls must be measured accurately in order to correctly calculate both the height and width needed for the shower. In addition, any obstructions such as built-in shelves or other features should be taken into account. It is important to ensure that enough room is available for maneuvering when entering and exiting the shower area, including taking into consideration other bathroom fixtures such as toilets, vanities and sinks.
Any necessary opening for a window must also be addressed when calculating measurements for sizing purposes. If an existing shower does not have proper measurements, new ones may need to be taken before purchasing or ordering materials for installation of a new enclosure. Determine if any existing floor molding needs to be modified in order to properly fit and secure shower walls together at appropriate heights without gaps or other issues with sealing against water infiltration.
:strip_icc()/101963996-8ee3078bc50240909d333e8024164b14.jpg)
Removing the old shower enclosure
Before installing the new shower enclosure, you’ll need to remove the old one. Start by turning off the water supply to the shower and then disconnecting any pipes connected to it. Depending on your plumbing system, you may need a wrench or a pair of pliers for this.
Once the pipes are disconnected, unscrew the screws that hold the old shower enclosure in place and carefully remove it. In some cases, you may have to use a crowbar or pry bar to remove stubborn pieces of the shower enclosure that won’t come loose with normal tools.
Be careful not to damage any existing tile as you remove the old shower enclosure as this will make it difficult for your new enclosure to fit in place properly.
Preparing the work area
One of the most important steps in any home improvement project is to plan, prepare and protect. Before you begin your shower installation, there are some preparatory steps that need to be taken. Proper preparation will not only protect you, but it will also protect those around you from injury caused by the tools and materials used.
Start by turning off the water supply to the shower and preparing your work area. Your work area should include enough space for tools and materials as well as room to maneuver with a tape measure, saws, levels and other tools. You may also want to make sure there is good lighting so that you can see everything clearly during the installation process. Next step is covering your floors with drop cloths or a tarp so that any mess made during the installation process can easily be cleaned up later. Protecting furniture or other finishes from drops of moisture or scratches by covering them with painter’s sheets or blankets will also help ensure success. Finally, don’t forget safety glasses and a dust mask — these two pieces of equipment should always be worn when using saws or drills directly over your head or in areas near dust particles.
Removing the old enclosure
If you’re replacing an existing shower enclosure, begin by removing the old surround or door. Depending on the materials used, the enclosure may need to be cut off, especially if caulking was used to secure it. Start at one of the corners and work your way around until all of the pieces are removed. Take care not to damage any surrounding walls or fixtures in the process.
Next, it is important to thoroughly check for any underlying causes for why you are replacing your enclosure. For instance, check for rot or mold growth and make sure that any grimy residue from mildew is completely gone; otherwise, it may reappear with a new shower installation. Remove any leftover adhesive, nails or screws as well. If installing a new bathtub or shower stall at this time, it is especially important to ensure that these areas are free of debris prior to installation.
Conclusion
It is important to remember that installing a shower enclosure is not a job you should undertake unless you are experienced and have the right tools. Many people can do this installation on their own, but if you do need help make sure that the help is a professional who has done such jobs before. It also important to buy quality tools and materials as this will ensure better results and less time is spent on repairs and replacements down the road.
Now that you have successfully installed your new shower enclosure, there are a few steps to ensure it stays perfect for years to come. It’s important to regularly clean your glass door so it remains transparent with no spots. Make sure the frames of your door are kept in good condition, checking for missing screws or signs of wear or damage. If your finish has become tarnished, replace it with fresh paint or finish every few years so it retains its original color and shine over time.
Finally, always keep health and safety in mind when installing a shower enclosure; ensure everything fits securely without compromising safety or privacy for anyone using it. With these tips in mind, your shower enclosure will be an investment that you can be proud of for many years to come!
See Also :
- Best Ductless Bathroom Exhaust Fan
- Best Dehumidifier For Bathroom
- Best Blinds For Bathroom
- Best Bathroom Trash Can
- Best Bathroom Speakers